
PLEASE PRINT OUT THESE PAGES FIRST AND THEN KEEP THE PRINTED TEXT BESIDE
YOU AS A GUIDE WHEN YOU LOAD AND RUN "NEURON". THIS WILL SAVE YOU HAVING
TO JUGGLE BETWEEN NEURON AND NETSCAPE WINDOWS ONCE YOU HAVE THE SIMULATION
LOADED.
To begin working with this chapter you should have downloaded and installed
Neuron, as described in Chapter 1.
Preparing for the simulation: This simulation brings together all of
the concepts presented in Exercise 1 through 5. Load
the simulation.
This simulation of a "real" nerve cell is offered to demonstrate
some features of synaptic integration and impulse generation. For this
example we have chosen a cortical pyramidal neuron whose shape was imported
into Neuron from a neuroanatomical study. Both the model and some of the
language used here to describe it were developed by John Moore and Michael
Hines at Duke and Yale universities.
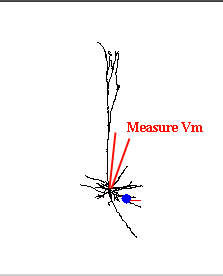
The pyramidal neuron model accepts two synapses on its many dendrites.
A voltage electrode is placed in the cell's soma:

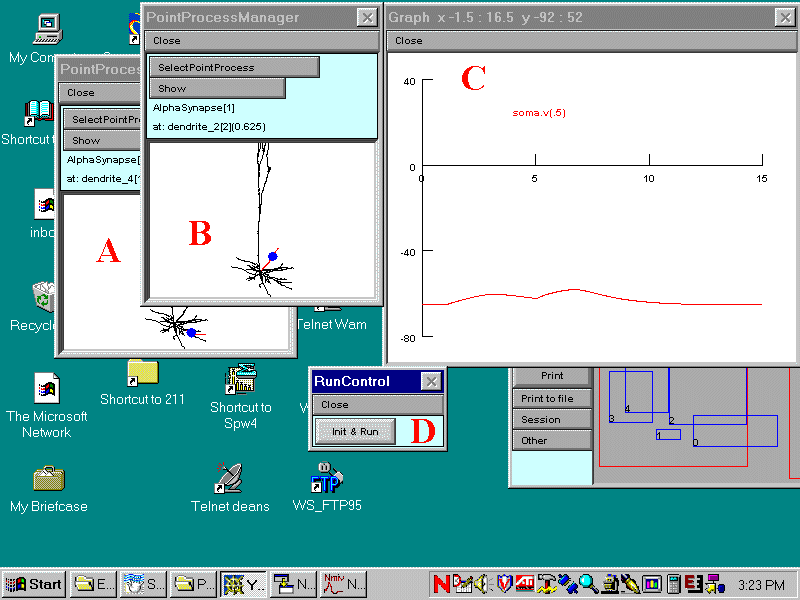
The various graphs and windows that you will see are described below.
When you have loaded the simulation you should see Windows arranged
as below. Click on the following letters: A B
C D for a description of the function
of each Window.
Return to Instructions

A and B. These Windows are used to show and alter the position and characteristics
of the two synapses.
Click on "Show" to bring down a menu that allows you to switch between
viewing the "Shape" of the neuron or the "Parameters" of the synapse:
In "Shape" (as shown above), clicking on any part of the neuron will move the synapse (blue dot) to that point.
In "Parameters", the time of onset, amplitude (maximal conductance) duration (tau) and reversal potential (e) of the synapse can be modified.
Return to letters
C. Graph of membrane potential (mV) vs time (ms) recorded by a voltage electrode placed in the soma of the neuron
Return to letters
D. The Run/Control Box - click on Init & Run to run a simulation.
Return to letters