PostgreSQL portable version
For developers working in corporate environments, admin privileges to install software might be restricted. But if we’re looking to explore PostgreSQL on our own, here’s a step-by-step guide on installing PostgreSQL without admin rights on a Windows system. Follow this guide to set up PostgreSQL manually and verify the installation without requiring administrative permissions.
Download PostgreSQL Binaries
To begin, we’ll need the PostgreSQL binary files rather than the standard installer:
- Visit the official PostgreSQL binaries download page at https://www.enterprisedb.com/download-postgresql-binaries
- Choose and download the version you want in ZIP format (e.g., PostgreSQL 15).
- Save the downloaded file in a location where you have full access, such as C:\PostgreSQL and extract it.
- Visit the official PostGIS binaries download page at https://download.osgeo.org/postgis/windows/
- Choose and download the version corresponding to your PostgreSQL version (e.g., postgis-bundle-pg15-3.6.2x64.zip).
- Extract the PostGIS files directly over your extracted PostgreSQL directory, merging the bin, lib, and share folders.
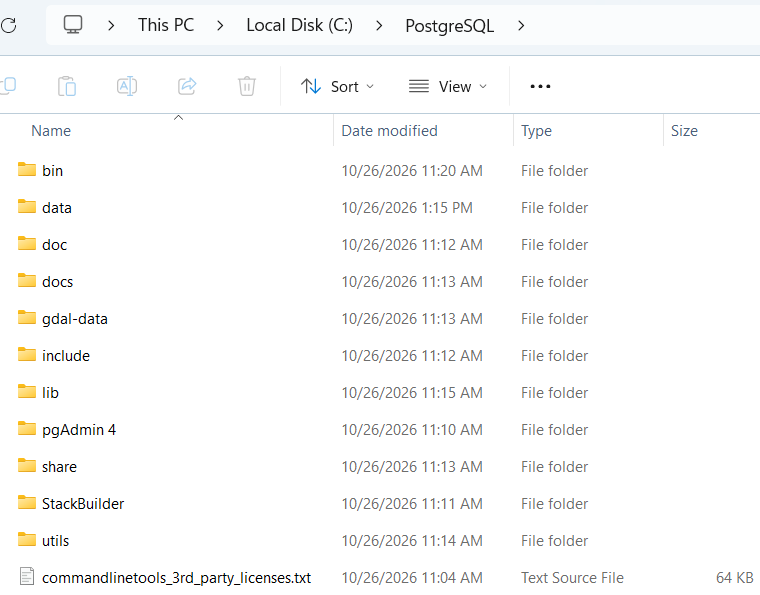
PostgreSQL with PostGIS extension after extraction
For your reference, you can also go to https://terpconnect.umd.edu/~xtao/geog670/ and find PostgreSQL.zip to see an example folder structure.
Verify the Installation
To verify if it is installed properly, use the following commands. The below command checks the PostgreSQL server version:
postgres -V
Sample output:
C:\PostgreSQL\bin>postgres -V
postgres (PostgreSQL) 15.19
Initialize the Database
Now it is time to initialize the database and associate a user to this. The database will be initialized at the location given by us (data folder in this case). The command for this is as follows:bin\initdb -D data -U postgres -E utf8
Explanation of flags:- -D path/to/db/server/: Specifies the directory where PostgreSQL data files are stored.
- -U name: Creates a superuser with the specified name.
- -W: Prompts for a password for the superuser.
- -E encoding: Sets the character encoding for the database (e.g., utf8).
- -A: Encrypts the superuser’s password for added security.
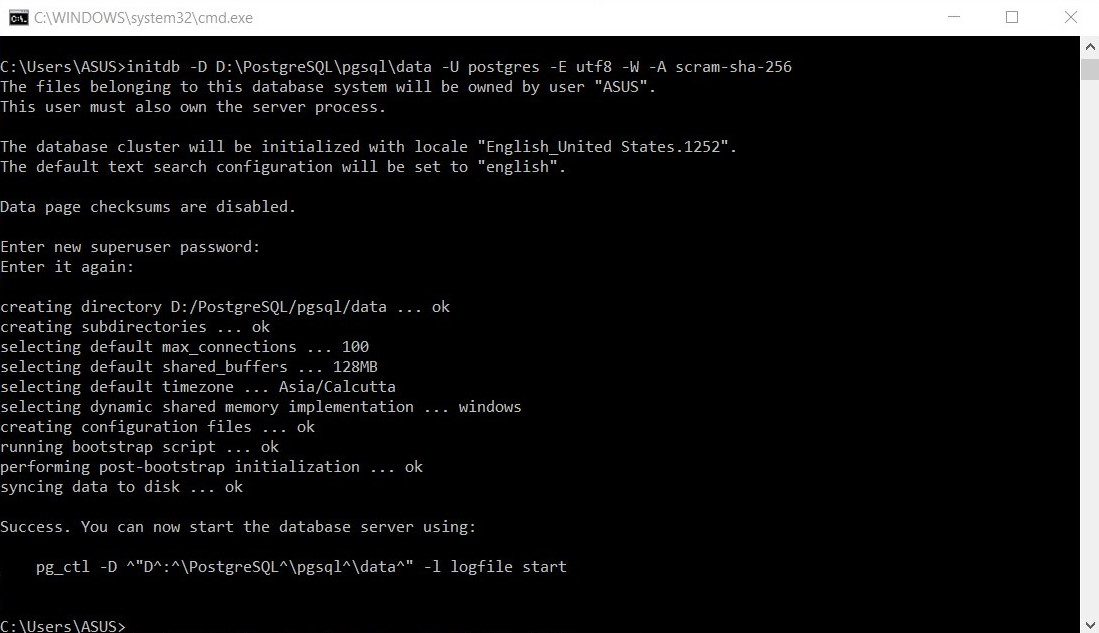
PostgreSQL initdb
Start the PostgreSQL Server
Start the database by running the following command. This command starts PostgreSQL and logs its activities in a logfile.
bin\pg_ctl -D data -l logfile start
Sample output:
C:\PostgreSQL>bin\pg_ctl -D data -l logfile start
waiting for server to start.... done
server started
Use command line to connect to the database:
psql -U postgres -h localhost
Sample output:
Password for user postgres:
psql (15.19)
WARNING: Console code page (437) differs from Windows code page (1252)
         8-bit characters might not work correctly. See psql reference
         page "Notes for Windows users" for details.
Type "help" for help.
Register server in pgAdmin 4
Go to C:\PostgreSQL\pgAdmin 4\runtime, and double click pgAdmin4.exe. Register server by right clicking Servers > Register > Server. In General tab, set the name as localhost:
Register localhost server
In Connection tab, set the Host name/address to be localhost, leave it empty or type your password: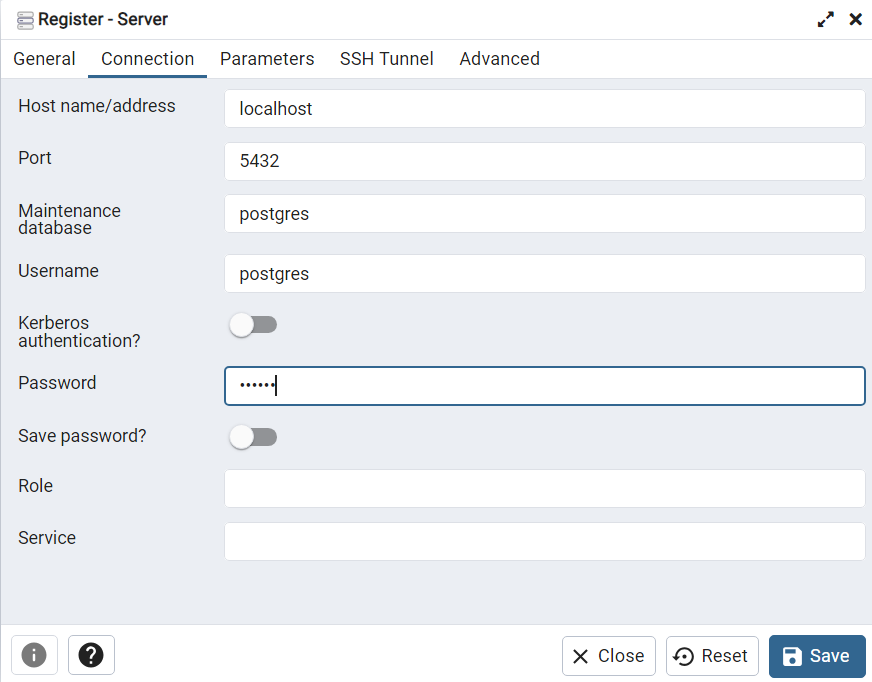
Connect to localhost server
Click Save and it will connect now.Stopping the PostgreSQL Server
To stop the database, use the same command used for start and replace start by stop.
bin\pg_ctl -D data -l logfile stop
Conclusion
With this guide, we can now install PostgreSQL on Windows without admin rights and have complete control over the database environment. This setup allows developers to explore PostgreSQL’s powerful capabilities in restricted environments, maximizing productivity and flexibility.
Posted on October 22, 2026 by Xin Tao